The other day I was at my sister Elisa’s house, watching her two cuties while she had a date night with her hubby. OH how I loved holding her new little one. It brought back happy memories of holding my newborns and never wanting to put them down. Well, as I sat there relishing that sweet baby, the picture above the fireplace kept catching my eye and I fell in love with it, especially with the frame she paired it with. The frame looked like a rustic barn wood. OH IT WAS BEAUTIFUL! I know if I asked her to take a picture and send it to me, so I could share it with you, she totally would. But I also know what it’s like to have a newborn and a 4 year old, and since I hadn’t thought of sharing this story till now (as I’m writing at night, getting ready to post in the morning) I’ll let her share it another time. I found the picture on Etsy though at the SweetnSandy shop. Anyway, as I fell in love with this picture I had visions swarming around in my head of colors I wanted to implement in my home and a little change of decor as well.
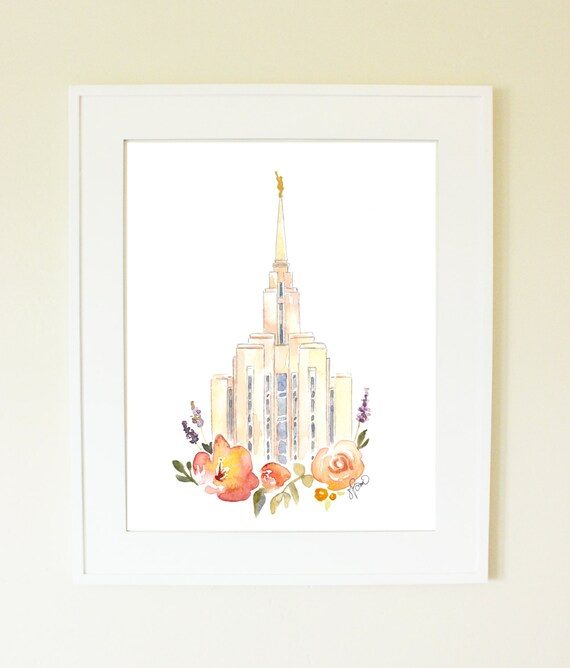
This month the theme for Inspire My Creativity is flowers and the flowers in this picture made me want to replace my raggedy old throw pillows, with some flower pillows. I’m loving the flowers like these. I don’t know if I’m just drawn to them or if it’s the “in thing” right now, but they make me happy. I decided to attempt what I see in my mind, on a pillow and add some of this happiness to my living room.
Items needed for 2 pillows:
- 2 16″x 16″ pillow forms
- 1/2 yd white cotton fabric
- 1/2 yd burlap (if you want to back the pillow with burlap like I did. Otherwise 1/8 yd will do)
- 1/8 yd gray felt
- 1 light pink felt square
- 1 dark pink felt square (I bought a fleece for this one because it was the color I was looking for)
- 1/3 yd cream felt
- hot glue and glue gun
- sewing machine
Cut 2 squares of white cotton fabric at 17″x 17″. Cut 4 pieces of the burlap (or if you choose to do the white fabric for the back) at 11″x 17″. Fold about 1/2″ on one 17″ side of each back piece and sew. With right sides together take your front piece and 2 back pieces, matching outer edges and over lapping the 2 back pieces at finished edge, in the middle. Sew the edges all the way around. Because I used burlap, I was sure to give it a good 1/2′ seem allowance so as to be sure the burlap wouldn’t pull out of the seam. Cut the corners and turn right side out. Put your pillow form inside.
Make your flowers: Cream flower- Cut 2 circles for each large flower, about 11″ diameter (I traced a dinner plate) and one 5″ circle for the small ones (I traced a small cereal bowl) Cut the circle in a spiral to the middle in a crescent type waves.
Now starting from the middle, twist and wrap the felt, adding dabs of glue along the way to keep it together.
 With the second spiral, cut the middle section off, then starting with the outside ring, add it to the flower in the same way you were doing before. Once you have your desired look, glue the end down and trace a circle the size of the flower bottom, around 8″ in diameter, it may vary depending on how tight you wound yours. I tried to keep mine fairly loose to get the big flower.
Gray flower- Cut 2 pieces at 2″x 21″ and 2 pieces at 2″x 5″. Fold the piece in half lengthwise and cut 1/4″ slits on the folded edge to 1/4″ from the raw edge (You can put some dabs of glue along the inside here and there to hold it closed as you are cutting).
 Once you’ve cut along whole length start from one end and roll, adding dabs of glue along the bottom edge, every few inches, keeping it tight. Be sure to add some glue at the end to hold it closed.

At the point of this picture is where I decided that the cream flower needed to be bigger, therefore adding the second spiral.
Pink rose bud- trace and cut about a 3″ circle (2 of dark pink and 2 of light pink). This time cut your spiral in a wavy pattern to the center.

Starting from the middle again twist the fabric onto itself, adding dabs of hot glue along the way. This time I made it a little tighter than with the peach flower, creating a rosebud look. You can loosen or tighten to get the size you want.

Cut 3 leaf shapes from burlap, about 5-6″ long. Sew around the edge of each to help it from fraying. You can also use felt here if you would like to do green leaves instead. I pinched the middle of the bottom of each leaf to give it some dimension.
Once you have made all your flowers, place them on your pillow and you can either hot glue them down or hand sew them. Since it is just a throw pillow, I decided to hot glue them to save time.


When I finished and the pillows had been sitting on my couch for a bit, my 9 year old son noticed them and said, “mom, I really like these pillows you made.” Now that doesn’t happen very often! And now I know they are a good addition to our living space.
Now enjoy this little bit of happiness in your home. SEE THE HAPPY!


For more flower crafting fun check out these other talented bloggers and please link up any flower posts you have. Then join us next month for the theme SPRING!


What a beautiful pillow! They are perfect for Spring!
I love this pillow! Thanks so much for the detailed tutorial. I keep wanting to make flowers out of paper or fabric and I think I can do it now!
Thanks Amy! The flowers were so much fun. I was tempted to keep going but ran out of time. I will surely be making more felt flowers in the near future. It’s surprising how easy they are.
That’s so pretty! I wouldn’t have thought to add flowers to a pillow like that but I love the end result! This makes me want to try making one.
Thank you Christine! I had to give it a try. My pillows I had were getting pretty shabby and I just love felt flowers. These were so much fun to make, and so easy.
Very pretty! Love making felt flowers. Visiting from Inspire My Creativity.
What a pretty pillow!
This is so pretty!! I would love one in spring colors for my living room. I can cut felt with the Cricut Maker. I’ll have to try this!
Thank You Pam! I want a Cricut Maker. I have the Cricut Explore Air, which I was told would cut fabric but I have not been successful yet. New blade, purple mat….Nothing works. Then I saw the Cricut Maker and now I wish I had that one. Some day:)