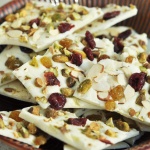
White chocolate. White Chocolate Bark. Raise your hand if you love it! With my husband being from Ecuador, white chocolate is more his kind of style when it comes to chocolate, something he grew up eating more than milk chocolate. My style is really ANY kind of chocolate. I am a chocoholic through and through! I am always looking for new recipes my husband will partake of because, for reals, I will eat a whole pan of brownies over a week because no one else in my family likes most of the treats I make 🙁 My husband and kids prefer potato chips over sweets any day of the week. Hence the White Chocolate Bark. I like people to enjoy a treat with me, otherwise its just not as fun. Anyone with me on that? Well, this is seriously one of THE easiest treats you will ever make. Takes a whole five minutes to prepare!

Start off with prepping your toppings. I did golden raisins, craisins, slivered almonds, and pistachios. I really only had to coarsely chop the pre-shelled and pre-roasted pistachios because everything else was ready to go. It’s all up to you on what you want to add – really any nut or dry fruit will do. If you decide on a larger dried fruit, say mangoes, I would dice them so they are bite sized 🙂

This is probably the hardest part, which is really not hard at all. Put your white chocolate in a microwavable bowl (I use ghirardelli white chocolate chips. Many will tell you to use white chocolate baking bars, but chocolate chips work great and are much less expensive!) and melt the chocolate in 20 second intervals. Microwave for 20 seconds, take out and stir. Again put it in the microwave for 20 seconds and stir. Repeat until it’s completely melted and smooth. I think I do it about 4 times 😉

Spread it out over a cookie sheet that is lined with parchment paper. You will spread the chocolate out over the top. I spread mine so it has about a 2 inch space to the edge of the cookie sheet.

Sprinkle the toppings of choice over the top of the chocolate. Lightly press down on the toppings with your hand so they will dry inside the chocolate. Place in the refrigerator for about 2 hours for it to set.

I used a knife and you just have to kind of poke the chocolate, it will break into cool looking broken glass type pieces for all to enjoy.

With St. Patrick’s day coming soon I added the white chocolate bark to some cute clear bags I buy at Walmart on the cake decorating aisle, added a cute green bow, and gave them to some people I wanted to thank for their kindness. Packaging fun treats is always one of my favorites – I am a sucker for fun packaging!
I hope you guys will give this a try – its bright and happy for Springtime, which I am super excited to celebrate here soon! Let me know what you think!
See the Happy!

- 16 oz white chocolate chips I use ghirardelli chocolate chips.
- 1/2 cup roasted pistachios coarsely chopped
- 1/4 cup golden raisins
- 1/4 cup craisins
- 1/4 cup almonds slivered
- Prep a cookie sheet with parchment paper. Prep all your toppings so you have each one already measured.
- Melt your white chocolate chips in 20 second intervals. Microwave for 20 seconds, take out and stir. Again put it in the microwave for 20 seconds and stir. Repeat until it's completely melted and smooth. I think I do it about 4 times. *Do not make the intervals any longer than 20 seconds because the chocolate can burn.
- Once the chocolate is melted completely and is smooth, spread it out over the parchment paper so that there is about a 2 inch gap between the end of the chocolate to the edge of the cookie sheet. This will make it so your bark is not too thick or too thin.
- Sprinkle your toppings over the top of your white chocolate. With your fingers, lightly push the toppings slightly into the chocolate so it will set with everything inside and not fall off when you cut it.
- Place in the refrigerator for at least two hours. Using a knife, gently poke with a tip and the chocolate will crack in different ways. Place in a bowl and enjoy!


