

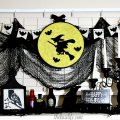
Anyone want a last minute Halloween decor idea? And when I say last minute, I mean LAST MINUTE!! These cute Mummy Jars really only take minutes to make. I saw this post over at the “All You” blog but then I adapted it for my own needs, which are QUICK AND EASY. You will all soon find out that I am all about getting things done the fastest and easiest ways possible, yet making sure things turn out amazing!!
First thing to do is collect a few things (it will take you longer to do this step than the rest of the project).

- Jars- odd numbers look best(go find one of those jars you got as a neighbor gift filled with yummy jam last Christmas, taking up space on your storage shelf OR have spaghetti tonight and clean out the jar from the spaghetti sauce and Wallah! Mummy Jar perfection)
- Glue gun and glue sticks
- Cheesecloth (this I found in the notions aisle of the fabric section at Walmart. Looks like on the other blog they even used medical gauze, which might be something you just happen to have at home)
- Googly Eyes (sizes big and small are always fun)
- Tea lights (opt.)- sorry, I forgot to put these in my picture of materials but there is a picture of one at the end.

I started out by cutting my cheesecloth the circumference of my jar, you can also cut large strips to glue around the jar, especially if you are doing a large jar. Since my cloth is folded, I opened it to be one layer thick.

Then I made some very light squiggly lines on the jar- I recommend starting at the top. This is where you want to act quickly. You don’t want your glue to dry before you get the cloth on.

You need to do light lines of glue, meaning don’t do big globs because when you go to put the cheesecloth on it will go through the cloth and burn your finger. (ok, so a light bulb just went off in my brain! Rather than using your finger to press the cheesecloth on, you can use a popsickle stick. This would be great especially if you have your littles helping you. Then if you get a little too much glue it won’t matter) Now act quickly, starting with one end of the cloth, and push the cheese cloth onto your glue and wrap around the jar.  (Don’t mind my half washed off notes on my hand. That is the only place I can write a note where I won’t lose it. I found out not too long ago that I got that from my mom as we both put our hands up and both had notes to ourselves on them. Mine are things I need to take care of before it washes off, otherwise I rewrite it. HAHAHA, thought it was funny when I was putting the picture on and I saw those old notes.)

Add glue as needed to help the cloth stick wherever you want it to. I went down to the bottom and then back up again. The less uniform it looks, the better. Once you have covered the jar to your liking, give him some eyes. I decided to give this one a big one and a little one. Isn’t he ADORABLE!! “AAAWWW CUUUTE!” as my 3 year old, in his high pitched little voice, would say 🙂
Then if you would like, and I highly suggest you do, throw a battery operated tea light in and pat yourself on the back, you just finished another stinkin’ cute Halloween decoration. Doesn’t he just make you smile?
Add a few to your food table at your Halloween party (These are a couple that my kids made, notice the mouth, one of my boys put on with pipe cleaner). You can even have these Mummy jars hold your plastic cutlery or straws!! All sorts of ways to use them. . . how will you use yours?
See the happy!

This is adorable and such a simple craft idea! Love it!!
Thanks so much for stopping by Lindsay! They really are a great and easy way to get the kids involved and have some cute decor!