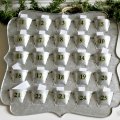
This Christmas Advent Calendar is pretty simple for craft challenged people like me. This particular project is one that I am pretty proud of as I made it up completely on my own. I usually will find something on Pinterest and follow a tutorial, but this came to me through my own creativity, and I love it when that happens! I was at a craft store that was closing its doors and they had these candy boxes for ten cents a package. Even though it was nothing that I needed, I could not pass it up! I bought a few packages and knew I could think of something to use them for. Fast forward a few months and I wanted to make a list of things that our family wanted to do during the Holidays and make some fun memories. I had seen a table top advent calendar that would be perfect to put little papers in telling my family what fun holiday activity we could do for each day, but it was not in the budget, and so out of necessity this was born. I had the ribbon I had bought the previous year on clearance, pine cones I had already purchased, and clothespins were just a dollar! The tiny chocolate boxes are perfect for the slips of paper, and it adds some fun to our Christmas decorations.
Let’s get started! You will need:
24 square candy boxes (they can be found in the wedding section of Wal-mart, Michales, Jo-annes, etc)
About 15 ft (90 inches) of red wired ribbon
About 16 ft of gold wired ribbon
9 pinecones ( I used some I purchased with cinnamon scent and they still smell after a few years!)
24 clothespins (the laundry section of the dollar store or Walmart have these, 50/$1)
gold paper for the numbers (I cut them out with my Cricut, but you could also purchase sticker numbers)
20 ft (240 inches) jute or twine
3 of the 3M Command small hooks
glue gun / glue sticks
Modge Podge
foam brush
4 inches of clear stretchy beading cord
Place the 3M hooks on the wall you would like to hang your advent on. I hung mine above our bay window, each 3M hook is about 55 inces away from the other. It says to let them stick for 30 minutes before you hang anything on them.
Cut 7 1/2 feet of red ribbon and tie a knot. Slip the hook through the knot. Using the wire in the ribbon manipulate the cut end toward the back, making a small curl to hide the end. Do the same on the far side. Take both ends and cross them on the middle hook. You will have quite a bit of ribbon, but you will need it to make your bow 🙂
The boxes come flat in the packages. Fold them so they form the box. Use a 3/16 drill bit to drill a hole for your jute to go through.
Cut 24 pieces of jute that are about 8 inches long. Tie a double knot and slip them through the holes you drilled.
Cut out your numbers with the machine of your choice. Using Modge Podge, spread one layer on the box, place the numbers on. Wait 10 minutes and spread one more layer over the top of the numbers. Allow to dry.
Cut 7 pieces of the gold ribbon – 1 at 25 inches, 2 at 24 inches, 2 at 22 inches, 2 at 20 inches, 2 at 19. Using the glue gun, glue the ribbons to the end of each pine cone.
Using the clear, stretchy beading cord tie all the gold ribbon together at the top, leaving about 5 inches of gold ribbon to curl.
Manipulate the gold wired ribbon and curl each ribbon around.
Using the stretchy cord we tied earlier, hang the pine cone cluster on the middle hook, then tie the large bow with the red ribbon.
When you are ready to hang the boxes, push the jute through the metal spring of the clothes pin. When you hang it on the red ribbon, pull the end of the jute and clip both the red ribbon and the jute, this will help them to hang straight 🙂
I have two different slips of paper in each box, one for a fun activity, and one with a different name of Jesus on it, so you can print one or both off, whatever suits your fancy 🙂
Here is a list of things we like to do during the holidays, and I have it HERE for you to print off for yourself. We have a great mixture of fun for us, and ways to lift others. Some are a little more time intense than others and require a bit of planning, others are quick, but fun ways to spend time as a family and make some memories. I usually make a calendar so I know what we are doing each day, and so I am prepared if there are things I need to purchase or make in advance. I also try to incorporate things that we need to do – like the Christmas cards, making neighbor gifts etc, that way I am not stuck doing all of that on my own.
This is a list of 24 different names for Jesus Christ found HERE. Instead of our regular scripture study, we look up a different name for Jesus in the Bible Dictionary, and then a scripture that has that name in it. It is really cool for the kids to learn, and for us to remember all that Jesus Christ is to us during this time of year. There are only 24, because on the 25th we always read the Christmas Story from the Bible before we open Christmas presents 😉
I hope you have lots of fun, help lift others, and spread lots of Christmas cheer this holiday season.


Love love love this!!!
Thanks so much Terrie Lou!
Love it! So beautiful and great for the home. I can’t wait to make this one for my house.
Thanks so much for stopping by Meagan! I would love to see your finished product!