This little sewing table has been with me since the first year I was married (that would be 20 years ago). I have been sewing since I was 16, at that time I would sew at the kitchen table or in my bedroom on the floor, I know… so weird. I would sit on the floor “criss cross applesauce” and use my knee to push the pedal as I hunched over to sew.
**This post contains affiliate links which means if you click on a link and make a purchase, I will receive a small commission at no additional cost to you. Thanks for your support!**

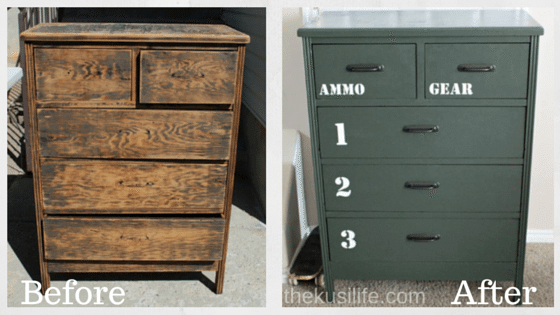
Unfortunately my before picture was deleted from my camera so I found this picture online that looks very much like what mine looked like before I started painting. I would give you the website it’s from but it took me nowhere when I clicked on it. So thank you someone out there who put this picture online for all to see.
When I got married, Derrel and I moved into a 1 bedroom apartment that we were so blessed to have found. Derrel’s little sister lived next door and told us about it being available right around the time we were to be married. We were only paying $280 per month for this thing- such a blessing for newlyweds. It was very small and didn’t allow for a kitchen table. So when I sewed (which wasn’t much at the time) it was on the floor.
My sweet mother-in-law came over one day and saw me sewing on the floor and insisted that I take this old sewing table, so I would have something to sit at. It has been with me ever since and has acted as the sewing table that it is, an entry table, a side table and so much more. I recently hit a point where I had to decide if I would keep it or not. It wasn’t serving any purpose and I just needed to get rid of clutter. I’ve kept this piece around all these years because it is sentimental to me and I love old things, I think it’s beautiful. In order to keep it, I needed to give it purpose.
I decided to make a much needed vanity for my daughter’s room. All it needed was a little paint, a mirror and a chair.
My favorite paint to use when refinishing a furniture piece is chalk paint, so that’s what we chose to do. Plus, this month’s theme for “Inspire My Creativity” is Chalk Paint so I will share what I know and like about chalk paint.
On my first chalk paint project I used used Annie Sloan chalk paint, which is great, but quite expensive. I’ve found that the Folk Art chalk paint at Joann works just as well, AND YOU CAN USE A COUPON!! So this chalk paint has become my favorite.

First I wiped the table down really well with a Clorox wipe. Then I, ever so lightly, sanded. I basically took a piece of 100 grit sand paper and ran it across the surface, just to give it a little scratch- something for the paint to adhere to. I’ve heard that you shouldn’t have to sand when using chalk paint but I like to give it the slightest bit of sanding.
On this piece I painted on about 2-3 coats of the chalk paint (some parts didn’t require as many coats as others) trying to get it evenly spread. This paint brush is a good one to use when painting with chalk paint. Here is another good paint brush that I like using. After I have the amount of coats that I prefer, I like to get a very fine sandpaper anywhere from 100-220 depending on how bad the brush strokes are (I’ve never found a way to avoid brush strokes- if you have a secret to doing that, please let me know), and lightly sand it to smooth out those brush strokes. Once I’ve done that, I take my 100 grit sandpaper and scuff up the edges to get that shabby chic look.
Now… when using chalk paint they say to use wax to seal it. I HATE WAX. I tried it on my first chalk paint piece, and maybe I was doing something wrong but I never was able to buff it enough to get that icky waxy feel to go away. I even bought the big expensive wax brush for applying, but the bristles kept falling off and sticking to the piece. Plus it seemed that no matter what cloth I used for buffing, there was always fibers and dust that would stick into the wax.
One day I decided to try some General Finishes Gel Topcoat. I loved it and have been using it ever since. 
It’s so easy to apply: Using a good thick glove (or sometimes I have doubled up a Walmart sack on my hand instead of a glove) with an old white sock over that, wipe it on evenly. **When doing white pieces you do need to be careful not to leave globs as they do turn yellow. Make sure you spread it evenly, without thick streaks. If you see yellow after it dries, you can always sand it down and re-apply a light coat of topcoat. I like to do about 2 light coats of the gel topcoat on white pieces. You can put it on thicker with colored pieces.
Here is the finished piece. Now to find a Mirror…

After searching long and hard, we finally found a beautiful mirror at TJ MAXX for $25. It’s perfect to finish off that shabby chic look.

I hope this has inspired you to give chalk paint a try. It is really the easiest paint I’ve used- besides spray paint I guess-I’ve heard you can get chalk paint in a spray can now!!
SEE THE HAPPY!!


I love the story behind the sewing table and that you found a new use for it. <3
Thanks Emy!! Yeah, I just couldn’t get rid of it.
I love those old sewing tables! It looks wonderful as your vanity with a new coat of paint!
Thanks Ali!!
So pretty. I would love to have a piece like that in my own room
Thanks Cathy!! There are many old sewing tables at thrift shops needing a new home 😉
Cute! I’ll bet your daughter loves it!
She does love it. She can put her make up on in her room instead of my bathroom:)
How sweet! I love how it turned out!
Thank you Christine.
This turned out so cute! I too do not like wax. I feel like it’s really hard to get right! It’s so much easier (in my opinion) to use a urethane top coat! I have not used the one you did- it sounds like I need to try it!
Thanks Candice! I recently tried another urethane topcoat and fell in love with that as well. I love the way this general finish top coat helps with farmhouse look though.
AWESOME makeover! As someone who spent years sewing on a tiny TV tray in a one bedroom apartment, I LOVE this!!
Thank you Meredith! You are my kindred spirit:)
I love how easy you explained this! I just got an old sewing table to repurpose as a vanity and I’m going to try your method of painting this weekend!
Thank you!
Thank You Joya! I am excited for you and would love for you to share a picture when you’re finished. Good luck!!