
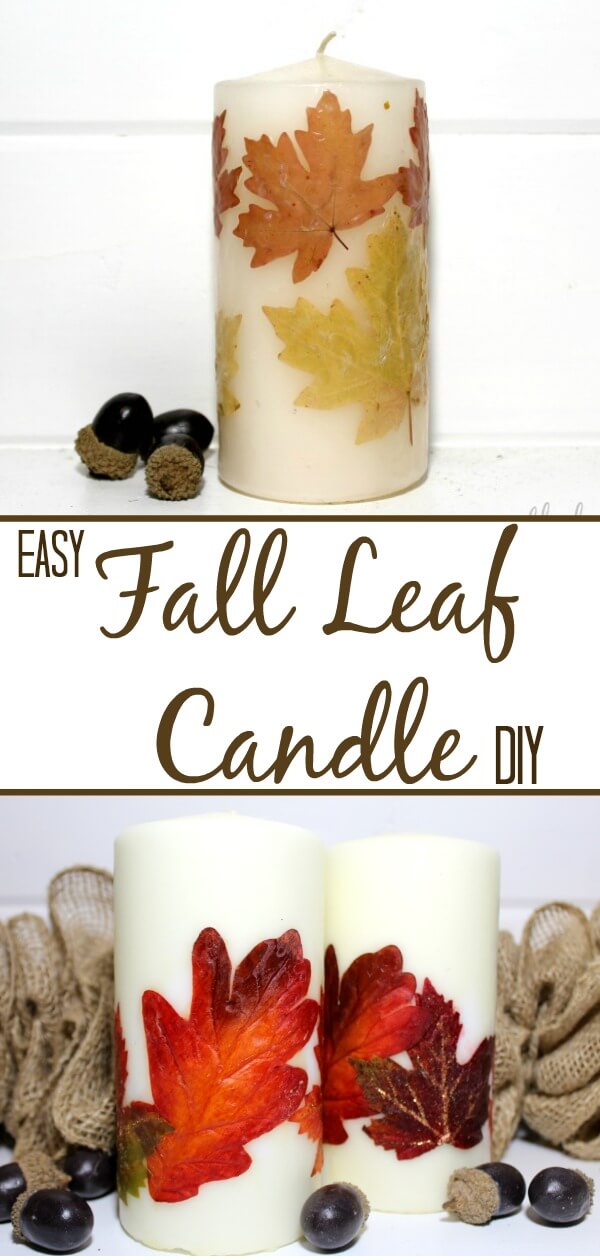
Fall is in the air!
It’s getting cooler at night and I love the slight chill in the morning. We are being given fruits and veggies from neighbor’s gardens (I am SO not good at gardening so I decided to forego the garden this year). And school is in full swing. One of my favorite parts of fall is the turning of the leaves. I can see high in the mountains, across the valley from me, that there is a little change but nothing near me yet.
The theme for the Inspire My Creativity link up this month is LEAVES, which is a perfect fit for this time of year. I wish the leaves were turning already though, so I could use real ones in this craft, but fall decor has been in stores for a while now so finding leaves is pretty easy.
My cousin made and gave me this candle probably 10-12 years ago. 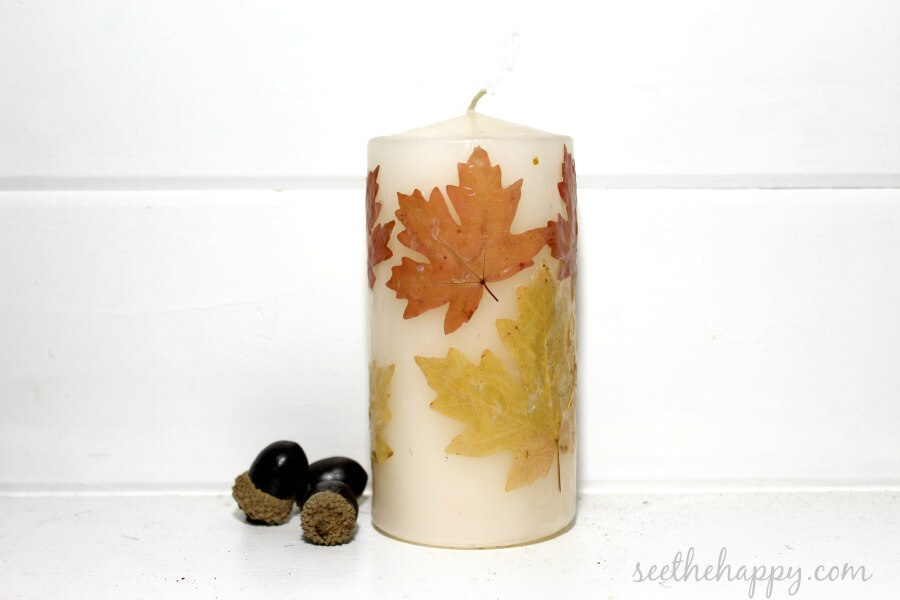 I have loved it and pull it out every fall. I thought I would see if I could make some and this is just so quick and simple, I don’t know why I haven’t made these before. You could even do it with other things, rather than leaves, for other holidays.
Items needed: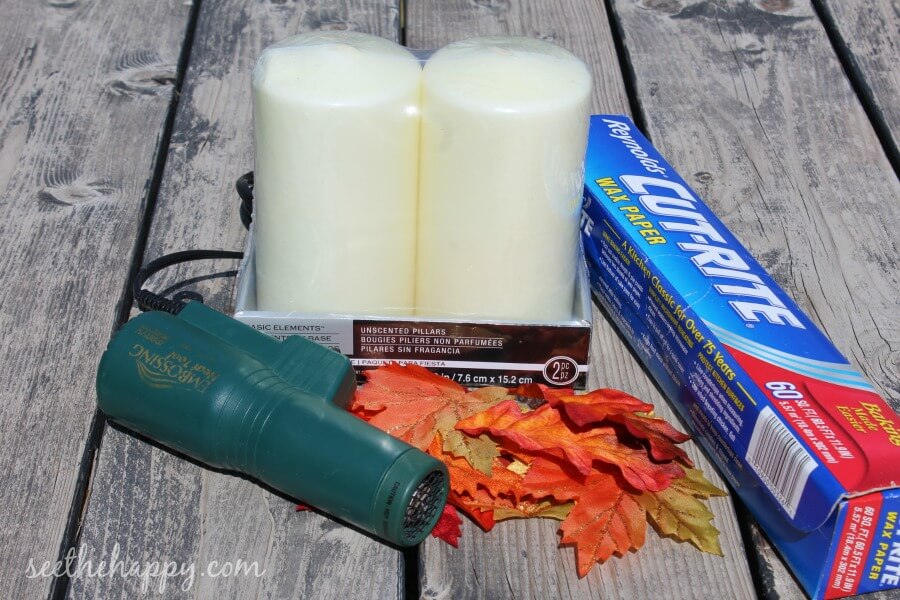
- Leaves- fake or real, preferably without bulky stems
- Pillar Candles- at least 3″ in diameter ( I got mine at Micheals in a package 2 for $7)
- Wax paper
- heat gun or blow dryer
If you compare my candles with her’s, you will see the difference between the fake leaves and the real leaves. The fake leaves have much more vibrant colors. The real leaves aren’t as vibrant but I sure love the look of them, they are perfect for the farmhouse look I love. So YOU decide, what’s your style? What look do you want to go for? If you choose real leaves, it might capture a memory that you can hold onto forever. Every time you pull out that candle, hopefully it would trigger the memory of gathering the leaves. So make it a fun outing with family or friends, gather some leaves for your candles.
Step 1
I found that putting them on one at a time is easier than trying to hold a bunch on at the same time. So first, decide how many leaves you want and where you want to place them. Then one at a time hold a leaf tight against your candle and place a piece of wax paper over it and hold tight.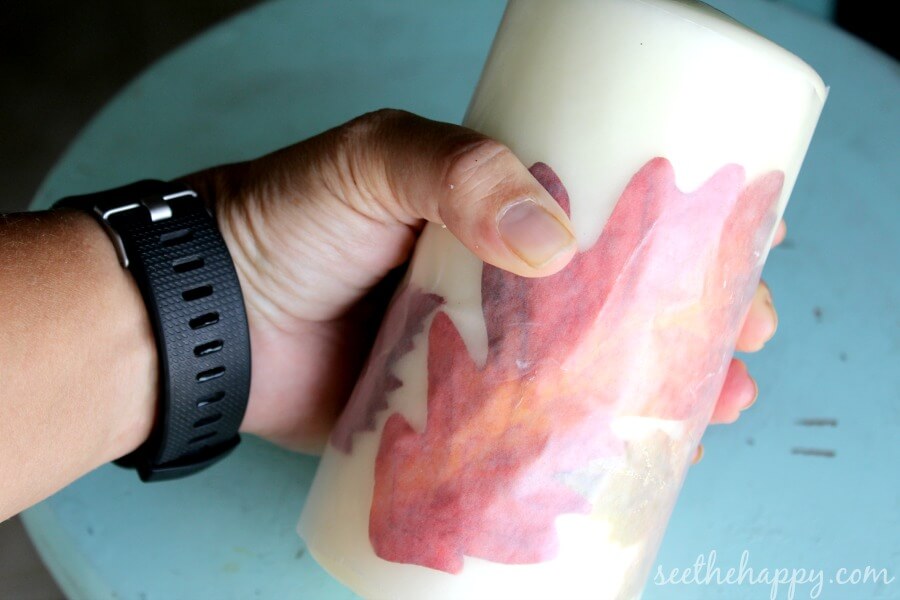
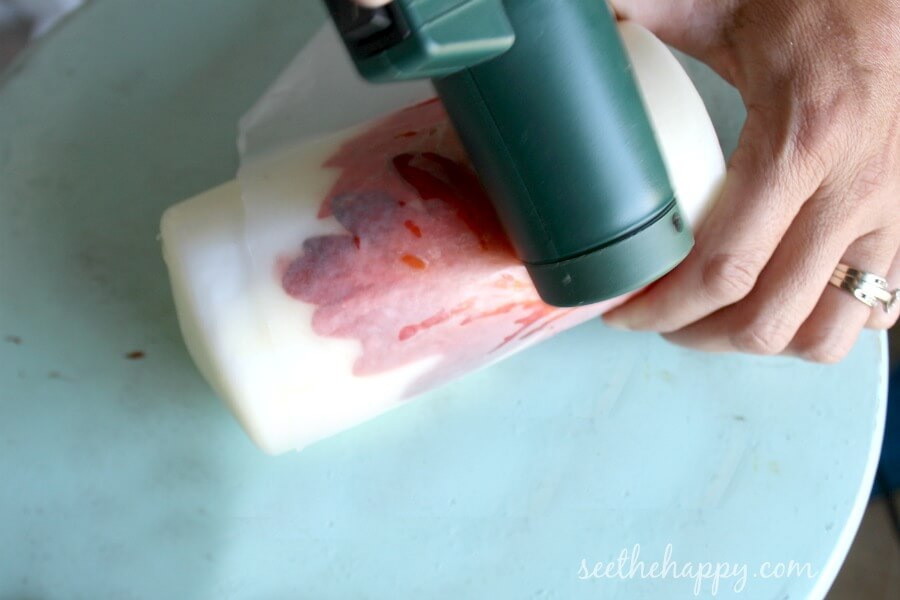
Step 2
While holding the leaf and wax paper tightly against the candle, blow hot air onto it with your blow dryer or heat gun (watch your fingers). After closely blowing it for about 3-5 seconds (often you will notice the wax paper melting onto the leaf), be sure not to go too long or the candle will melt and deform. 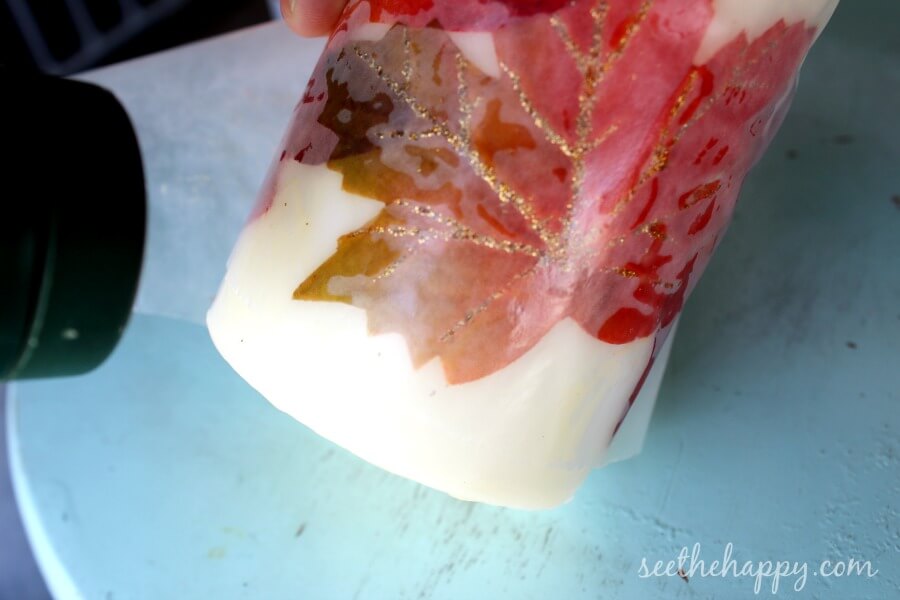
Rub with the side of your blower to firmly get the leaf on.
Step 3
Peal the wax paper off and it should be attached. If your whole leaf is attached, move on to your next leaf and repeat steps 1-3. There were times when I didn’t quite get all the edges. If you have this problem, just use an unused section of the wax paper and repeat. I tried to be sure I directed the heat to the spot I was focusing on attaching so I didn’t melt the parts that weren’t covered by the wax paper.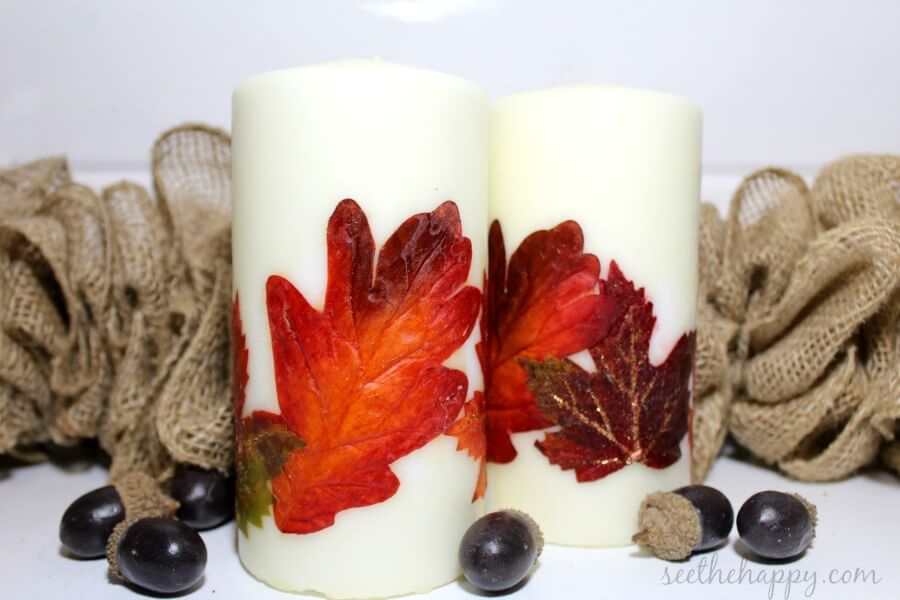
HAPPY FALL!! SEE THE HAPPY!

Check out more leaf crafts from these other bloggers. If you have any leaf projects you want to share, please link them up as well. Then, join us next month for a thrift store makeover.


Great and easy fall craft. Visiting from Inspire My Creativity.
These candles look great! What an easy idea to dress up some candles for fall. I love the changing of the leaves too!
Thank you! Yes, they were so easy and this technique could be used for other holidays as well:)
What a cool craft! I love them both but I think I like the ones you made a little bit better. They seem to have a hint of glitter!
Thank you Heather! Yes, they do have a little glitter in them. I like them both too, for different reasons. They will sit in different rooms of my home.
I never thought of blow drying something onto a candle. What a great idea and I love how it came out!
I’ve seen these done in stores but have never thought about making one. Fun idea.
I love this. They turned out really pretty. Traditional fall colors are my favorite! Please stop by the Merry Monday party and share this with us!
Thank you Shirley!! And thank you for the invite to the link up, I will check it out.
I’ve always wanted to try this. Looks like an easy way to add some fall colors to my decor.
Erlene, It is really easy! You should give it a try.
I think yours turned out best.
Thank you Niki! It definitely has some bright colors going on:)
This is so pretty! I love how the leaves look. I’ve done this with other things, but never leaves. I’ll have to try!
Seriously…this is genius! I will be on the look out for pretty leaves I can make into candles!
Thank you Candice! I’m sure you will love making these. Enjoy finding leaves:)