
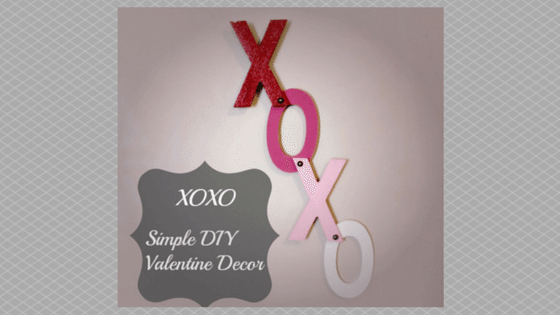
 I am always looking for new Valentine’s Day decorations and tend to be a little disappointed at the things I find. Maybe I am looking in all the wrong places, but I feel that there is hardly any Valentine’s Day decor out there. And what I do find, is almost always made of felt. This isn’t necessarily a bad thing, felt is awesome! I just don’t want ALL my Valentine decor to be made from felt, sometimes it can look a little cheap.
So a few weeks ago I saw this (please excuse the awful cell phone picture, I couldn’t even find a picture of it on their website) at Hobby Lobby and I kind of liked it, but wasn’t sure if I wanted it, and I couldn’t think of a specific spot to put it. I hate it when I do this because then I get home and see a place that would be perfect for it and decide to get it. Then sometimes when I go back to get it, it’s not there. Which is what happened with this wood heart. Only a couple of days had passed since I saw it in two different parts of the store. I wanted it enough that I tracked someone down to see if they could check if they had more somewhere. “NO”, these were one that they only got a handful of and when they were gone, they were gone. I was so bummed but realized that I had taken a picture and decided to make it myself and change a couple things about it to make it more what I want.
Here are the items needed:
- Wood square from Hobbly lobby(be sure to use your coupon) or buy it on amazon here Hampton Art Mix The Media Wooden Plank Plaque, 12″ by 12″
- Red acrylic glitter paint also found on amazonFolk Art Extreme Glitter 2-Ounce Acrylic Paint
- White acrylic paint (on amazon here Folk Art Multi Surface Paint
)
- Silver thumbtacks (which I had a hard time finding. Most places don’t have the good old silver thumbtacks, they were cutesy decorated ones. Finally, I found these at Micheals in their office section). I also found some on amazon here Silver Thumb Tacks
- Chalk
- Fine tip paint brush and medium paint brush (here is a great buy on amazon HeroNeo® 10Pcs Artists Paint Brush Set Acrylic Watercolor Round Pointed Tip Nylon Hair
)
*Meg is a participant in the Amazon Services LLC Associates Program, an affiliate advertising program designed to provide a means for sites to earn advertising fees by advertising and linking to Amazon.com
First find a heart you like. I used this heart clip art . I copied and pasted it into my Microsoft Word to make it as big as I needed. Then printed it off. After printing it turn it over and rub chalk on the back, tracing the heart. Get a good amount of chalk on it so there is plenty to trace onto the wood.
*Notice I turned the wood so the lines are going vertical rather than horizontal* Place the paper, chalk side down, where you want it- right about center. Trace with a pencil or pen. (Sorry I didn’t take a picture of this step. You will do the very same thing with the “love” at the end, I do have pictures of that) Now paint your heart inside the chalk lines you have created. I did 3 coats to make it nice and dark.

Next choose how close you want your thumbtacks to be. The Hobby Lobby version has them quite close and I didn’t really like that so I spaced mine out a little more. I barely pushed them in -one row at a time starting with the outside- to see where I wanted to place them. Then when I knew where I wanted them I pushed them all the way in. 
Once you have your tacks in you get to paint “LOVE”. I did the “love” the same way as I did the heart. I copied and pasted my cell phone picture into Microsoft Word and made it as big as I wanted. It was a little blurry but worked just fine. You can use this picture I have provided or if you have some fun fonts you can make your own. I just really liked the L and couldn’t find anything like it in the fonts I have. (If I had known I would be using this picture to make my own wood heart, I would have moved my finger. Ha Ha)

After you decide on your lettering. Trace the back with chalk and place the paper, chalk side down, on the wood where you would like the word. Then trace with pen or pencil.

It should look something like this.

With your fine tip brush paint over your chalk lines. I wet my paint down a bit as the paint was quite thick. I went over it a couple of times to make sure it was dark enough.

And there you have it! Where will you hang yours?
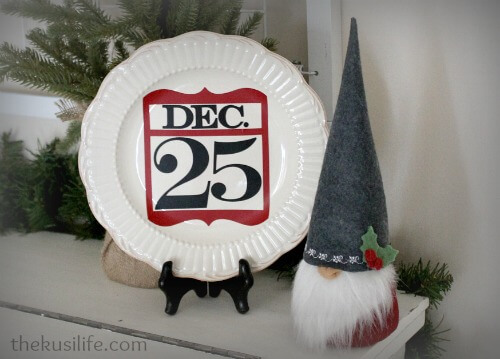
Here is mine. Sitting above my calendar on my family command center.
Just because you can’t find Valentine Decor doesn’t mean you can’t have it. MAKE IT!
SEE THE HAPPY!!


That’s super-cute 🙂 I like the one that you made better than the store version!
CJ you are so nice, THANK YOU!
I had no idea you could use chalk to do that! Thanks for that tip! I’m starting to gather ideas for how to decorate our new home, and this is super helpful for when I find things that I love that are expensive! You did a great job!
Thanks Chelsea! You are getting me all excited to see this new home. I know it won’t be for a few more months but I hope you share when it finally happens.
That is so adorable! Love it!
Thank you Annette!
Pingback: XOXO-simple Valentine Decor – The Kusi Life
I love the “polka-dots” on the heart!
Thank you Jaclyn! I like them too:)
Making it is always the best! Adorable!