
 Spring is on its way!
I love spring. We get a little peek of it every once in a while and I CAN’T WAIT for it to come fully. I am so excited for warmer weather, blossoms on the trees, sprouts in the gardens and decorating with pastels. I even saw a ladybug yesterday, and wonder where it is today since it is a full-on blizzard outside. Spring and Fall are my favorite seasons because it’s not too hot and not too cold and they are the perfect transition to the drastic temperature changes that come.
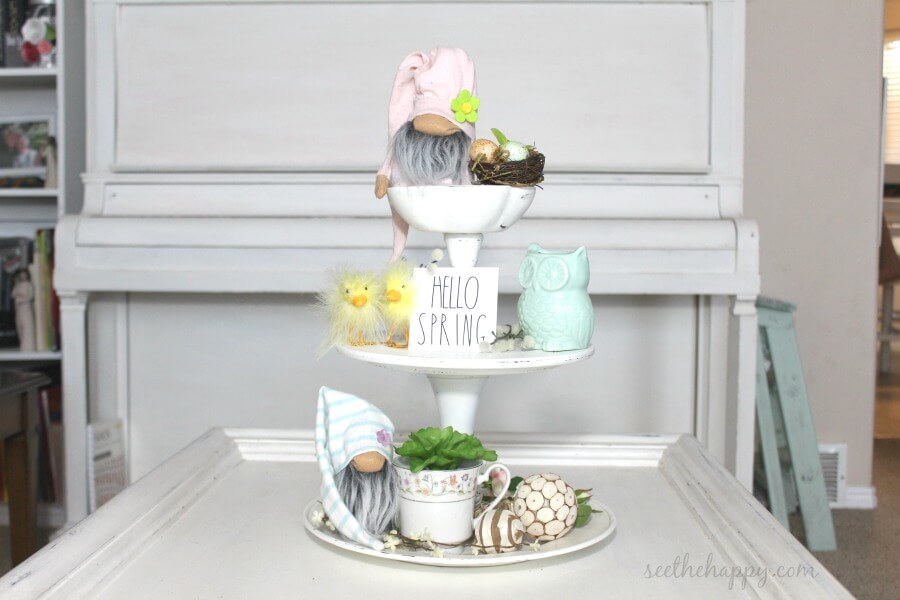
Lately I’ve been in love with the look of decorated tiered trays. I’ve searched for some to purchase and actually bought a metal one online because I couldn’t find one locally, anywhere! Hobby Lobby has the best selection I’ve seen but they just weren’t quite what I wanted. Sad that I couldn’t find a wooden white one with a farmhouse look, I did what I always do when I have a picture in my head of something I want, and can’t find it…I make it myself.
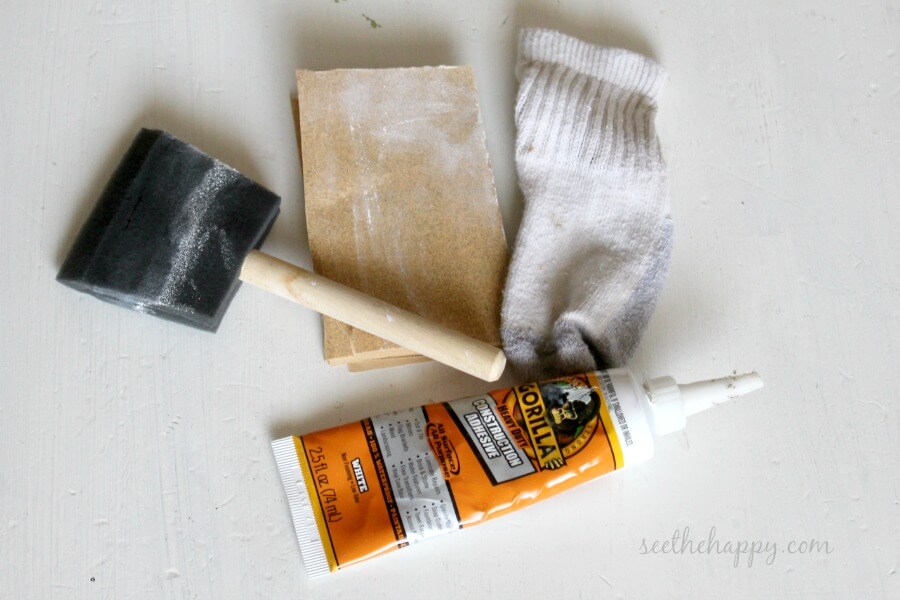
Items Needed:
- Three wooden plates- 1 large, 1 medium and 1 small. (Or, in this case I found a small bowl)
- 2 wooden candlesticks- one a little taller than the other
- Chalk paint
- sponge brush
- top coat
- Sand paper- 150-200 grit
- old sock
- rubber gloves or plastic grocery sack 😉
- gorilla glue

I purchased my wood pieces at a thrift shop bringing my total before paint to a whopping $3. I used paint and polyurethane I already had. This chalk paint I buy at Joann with a coupon, making the small bottle about $4, and it goes a long way.
Step 1
Clean and sand- Wipe down all wood pieces well. I like to use a clorox wipe, but you can use a wet rag as well. Then lightly sand each piece. No need to sand it down to the wood, you just want to scratch it up a bit.
Step 2
Paint- Paint a few coats of the chalk paint on each piece. I did 3, but you can do how ever many creates the look you want. Be sure to let each coat dry in between.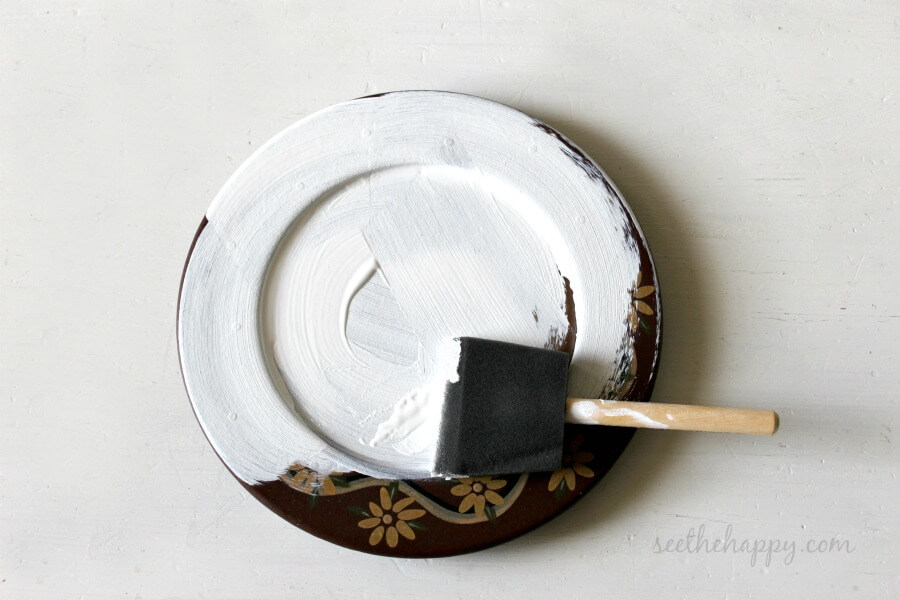
Step 3
Sand- Once you’ve gotten the layers of paint you want, lightly sand any streaks or drips. Also, if you like the well worn look, sand some of the edges down to show the wood, giving it that old farmhouse/vintage look.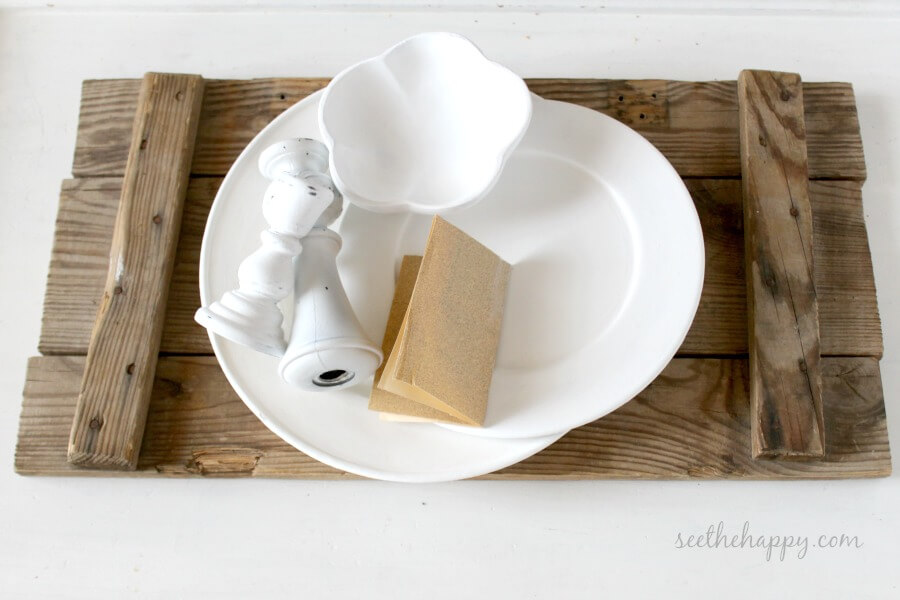
Step 4
Apply topcoat- With gloved hands (or if you are like me and would rather recycle, wrap your hand in a sack an old grocery sack) using an old sock, rub the topcoat onto each piece. Be sure not to leave streaks as it turns yellow. All you nee is a very light coat to seal the chalk paint so you don’t feel that chalky feeling when you touch it.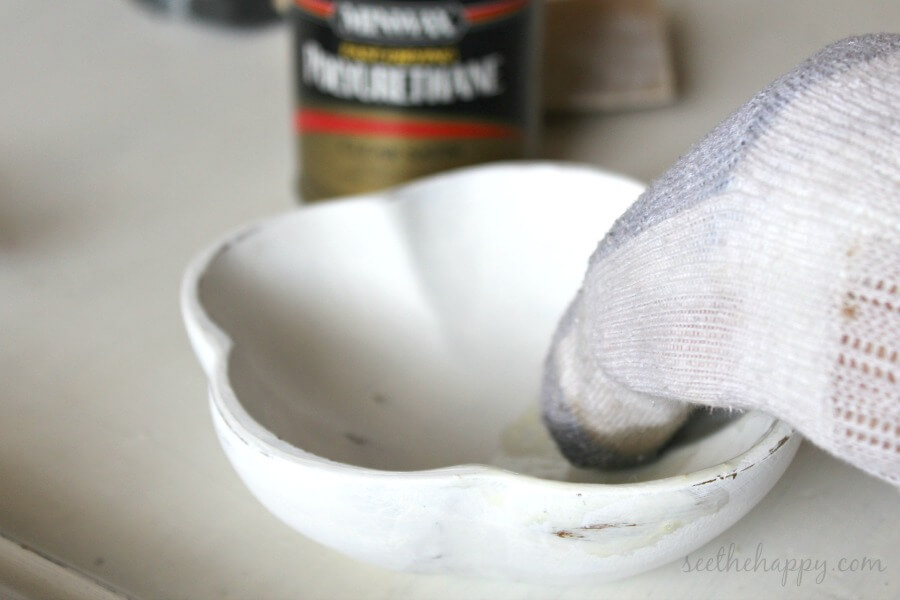
Step 5
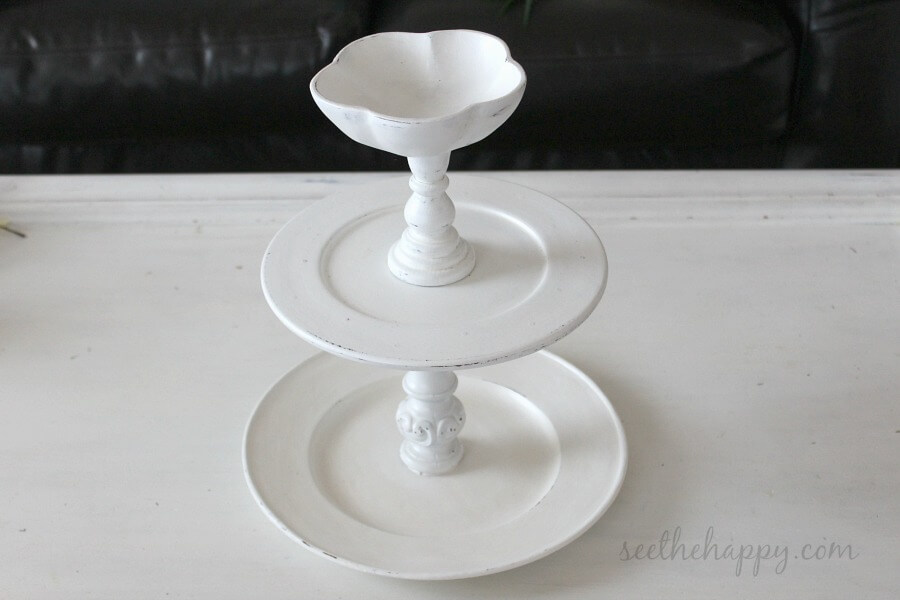
Glue candlesticks in place- Once the topcoat is dry, glue the taller candlestick to the center of the large plate. Add glue to the top of that candlestick and add the medium plate on top. Then glue the small candlestick to the center top of that plate and add glue to the top of that candlestick. Now add the small plate/bowl to the top of that candlestick. Allow all to dry completely.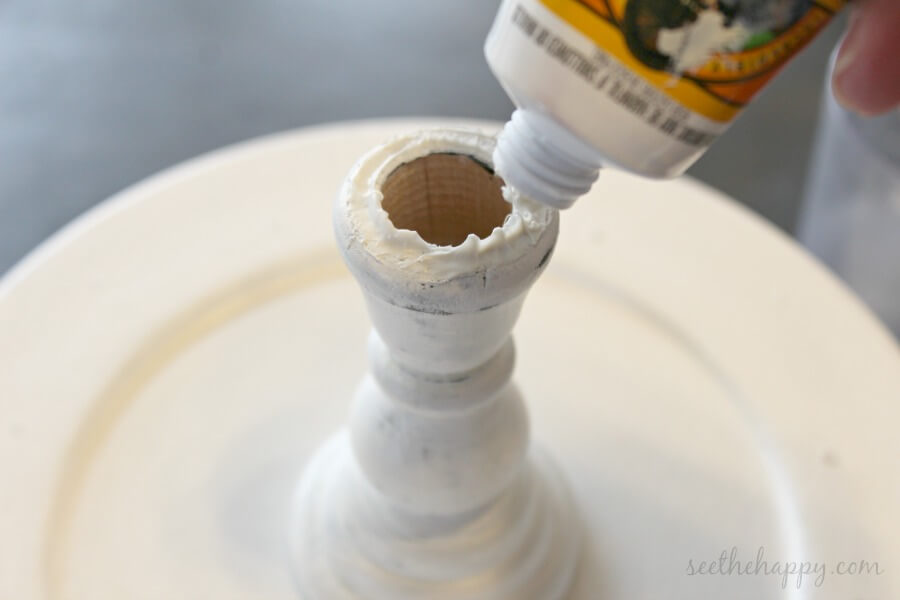
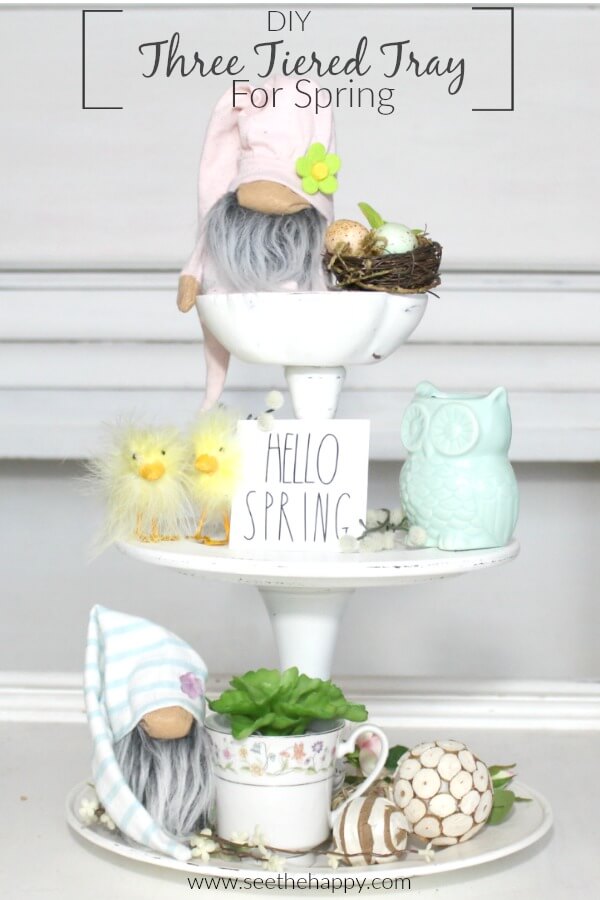
Now for the fun part, Decorating!
Ideas of things you can put on a tiered tray:
Flowers or plants, figurines, gnomes (I sell them in my shop at sewbeyondbeautiful.com . Spring gnomes will be added to the shop next week), birdhouse, fairy land items, small jar of candy, mug, nest, small signs, small holiday items… Really, anything that will fit. Have fun!! I usually have a few intentional things that I get specifically for each holiday, but then I find myself walking around my house and pulling things from shelves or drawers to fill up the tray.

For more spring craft ideas, check out these other blogs and link up any you would like to share. Then join us next month for the theme


I love how this came together and you made it yourself! I am always doing that. Searching for these ideas in my head with no luck finding them. I would have never thought to create this on my own.
This is beautiful! Something that can be used in so many different ways – thanks for sharing!
Love love love your tiered tray. I’ve been looking for a white one too and it’s shocking that they don’t have them. This looks adorable all decorated.
Ok, I’ve been wanting a tiered tray forever! I never thought to make one! So smart and SO DANG Cute!! Excuse me- I’m off to the thrift store to find the supplies!!
This will be perfect all year round! I love when I make something that can be used for multiple things. I can’t wait to see how you decorate it for all the holidays and seasons.
Your tray looks great! On my to-do list!!
What a clever way to make a tiered tray! I love how it turned out – so pretty!